How to Make a Basic Herbal Salve
There's nothing quite like an herbal salve for everyday skin woes. This simple, yet powerful, remedy can be altered to include any herb(s) of your choice and can be made to the exact consistency you want it to be.
That being said, many people view salve making as a complicated and mysterious process- something they put off trying again and again.
The good news is this couldn't be further from the truth!
A simple salve recipe can take as little as 10 minutes to make, and you only need a few ingredients to do it. It's a great project for beginner herbalists as long as you follow a few simple steps.
With that in mind, here's a closer look at what herbal salves are and a basic recipe that will help you make your own.
What is an Herbal Salve?
An herbal salve has two basic parts: an oil infused with herbs and beeswax (or carnauba wax for a vegan product).
The purpose of a salve is to get the benefits of specific herbs and the moisturizing, emollient properties of oil and beeswax in a stable preparation. Salves are easy to take on the go and will last for months to years, depending on which oil you use and how you store the salve.
Most often, salves are made for a skincare purpose, whether that's soothing dry or chapped skin, helping minor wounds and irritations to heal, or calming an issue like cradle cap or diaper rash in little ones.
However, salves can also be used for deeper support as in the case of a muscle salve or a vapor rub balm for chest congestion.
You've most likely seen quite a few examples of a salve without realizing it. Lip balm is a great example and so are common first aid ointments.
Unfortunately, many of these salve-like preparations (particularly ointments) are petroleum based rather than using natural ingredients like beeswax. By making your own salves at home, you have control over the ingredients and can tailor them to your specific needs.
First Step: Making an Herb-Infused Oil

One of the base ingredients in your salve will be an oil infused with herbs. While you can buy these oils if you need to, they are also extremely easy to make at home.
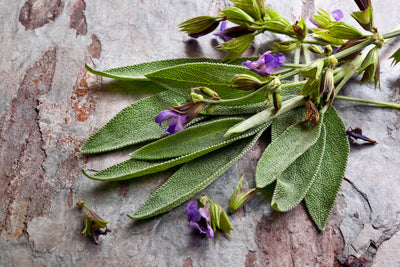
There are two main methods for making an herbal oil: one that takes more time and one that can be completed quickly. You can use any herb of your choice or a combination of herbs. If this is your first time, you may want to stick with a single skin-supportive herb like calendula.
Method #1: Solar-Infused Oil
This is the most traditional way to make an herbal oil. Use dried herbs to avoid adding moisture to the oil (which may spoil it) and a quality oil.
Olive oil is the standard choice because it's very shelf-stable and will not go rancid quickly, but you can also experiment with using almond oil, grapeseed oil, or coconut oil.
Ingredients & Supplies:
- High quality vegetable oil
- Dried herbs of choice
- Glass jar with a lid
- Cheesecloth or muslin
- Glass storage container
Instructions:
- Fill the jar about two-thirds of the way full with your dried herbs. Pour the oil over top until the herbs are completely covered by an inch or two.
- Cover the jar tightly and place it in a warm, sunny spot for 2-4 weeks. The longer you let it infuse, the stronger the oil will be at the end.
- Once or twice a week you can shake or swirl the jar to make sure the herbs are fully incorporated into the oil.
- When the oil is fully infused, strain out the herbs by pouring the oil through a few layers of cheesecloth or muslin and squeezing to get all the oil out. For a completely clear oil, strain a second time.
- Bottle and store your herb-infused oil somewhere cool and dark until you are ready to use it.
Method #2: Double Boiler Infusion
This method is much quicker if you don't want to wait weeks for your oil to be ready, but be very careful not to overheat the oil or it will lose its beneficial properties and go rancid quickly. Heating to a temperature of 95-110°F is ideal.
Ingredients & Supplies:
- High quality vegetable oil
- Dried herbs of choice
- Double boiler
- Cheesecloth or muslin
- Glass storage container
Instructions:
- Place your herbs in the top part of a double boiler and cover with an inch or two of oil.
- Heat the oil gently until it reaches a slow, very low simmer. Don't let it boil.
- Simmer for about 30-60 minutes, checking frequently to make sure the oil isn't getting too hot and stirring occasionally. The oil is fully infused when it has turned a rich green or golden color (depending on the herbs used) and smells strongly of herbs.
- When the oil is fully infused, strain out the herbs by pouring the oil through a few layers of cheesecloth or muslin and squeezing to get all the oil out. For a completely clear oil, strain a second time.
- Bottle and store your herb-infused oil somewhere cool and dark until you are ready to use it.
How to Make an Herbal Salve

Once you have your herb-infused oil, all you need is beeswax and you're ready to make a salve. This is a very basic recipe that you can add other ingredients to over time (like essential oils, for example).
The exact ratio of beeswax to oil depends on how firm you want the salve to be- something you'll find out with experimentation.
Ingredients & Supplies:
- Herb-infused oil (about 1 cup)
- Shaved beeswax or beeswax pastilles (about 1/4 cup)
- Double boiler or saucepan
- Tins or small glass jars
Instructions:
- Combine the oil and the beeswax in a double boiler or saucepan. Heat gently over very low heat until the beeswax has fully melted, stirring occasionally.
- Take about a tablespoon of the mixture out and place it on a plate. Put the plate in your freezer for 1-2 minutes, then take it out and check the consistency of your salve. If it's too firm, add more oil to the pan. If it's too soft, add more beeswax.
- Once you have the right consistency, carefully pour your salve into glass jars or tins (re-heat if necessary so that the mixture is liquid). Store the finished product somewhere cool and dark.
Congratulations, you've just made your first herbal salve! Now you can experiment with using different herbs and oils to make the perfect creation.
Best Herbs for Salves + Other Tips
There are numerous herbs that can be used to make a salve. It all depends on what your personal preference is and what you want to use the finished salve for.
Some of the best herbs for general skin support include calendula, St. John's wort, chickweed, lavender, plantain, comfrey, yarrow, and chamomile.
For muscle relief, you can turn to herbs like cayenne, rosemary, or arnica and consider adding essential oils like peppermint. Thyme and rosemary offer respiratory support as do essential oils like eucalyptus and peppermint.
In general, choose high quality dried herbs for your salves and a shelf stable oil like olive.

If you need more ideas for which herbs to use, check out these salves as examples.
As you can tell, a basic salve is pretty easy to make, but here are a few tips to make sure the process goes as smoothly as possible:
- Avoid moisture during all parts of the salve making process by using dried herbs, making sure all containers are completely dry, and ensuring that your double boiler doesn't splash. Just one drop of water can cause a salve to spoil quickly.
- Never use a non-stick pan to make your salve (stainless steel is best). The coating can contaminate it.
- Wipe out your salve-making pan before washing it to avoid getting beeswax down your drain where it will harden and clog everything.
- Designate specific pans for salve-making. It's impossible to get rid of beeswax completely, and you don't want to be eating it in your next meal!
- If your salve doesn't come out to the consistency you want it to be, you can take it out of the containers and re-melt it over low heat, adding either oil or beeswax to improve it.
When made correctly, your salve should last for at least 6 months and possibly for a few years. And by combining different herbs, you can quickly make a variety of salves for any skincare need!
Disclaimer: This post is for informational purposes only. It does not constitute medical advice and should not be substituted for medical advice. Please consult your health care provider, herbalist, midwife, or naturopathic physician before taking herbs, supplements, etc. Here's the link to our full disclaimer.


Leave a comment